Well, I survived Monday :) It was really hard to drag my weekend-hangover butt out of bed this morning, but the day went by quickly once I finally got over the Monday blues :) I had a great weekend! The homemade Chinese food smorg was a hit! I made sweet and sour pork, almond chicken, ginger elk (my boyfriend is an avid hunter), garlic shrimp and broccoli and plain ol' rice. Needless to say, everyone left in a happy food-coma and we had minimal leftovers! Woot woot!
Now onto the challenges for this week! I wanted to play along with Mojo Monday and the Paper Players. They worked so nicely together this week as the Mojo was a sketch (as always) and the Paper Players was a theme this week:
I went to my go-to baby colours, for gender non-specific cards: so saffron, basic grey, and pear pizzazz (sadly, retired). I adore the finished product:
Umm... cute! Need I say more? lol I used a green sharpie from my newly acquired Costco pack of sharpies to colour the little pearl in the center of the flower. Paper snips provide a cute accent on the ear of the elephant:
Thanks for stopping by today! :) I made another version of the Mojo Sketch for tomorrow as well... check back to see how it turned out!
Supplies used:
Stamps: Patterned Occasions (SAB), Teeny Tiny Wishes
Paper: So Saffron, Pear Pizzazz (ret), In Colour Stacks (ret), Howlstooth & Scarringbone (ret), Whisper White
Ink: Basic Grey
Tools: Nestabilities Circles, 1-3/4" Punch, Polka Dot Embossing Folder, Crop-a-Dile (ret), Itty Bitty Shapes Punch Pack, Word Window Punch
Accessories: Button (ret), Linen Thread, Green Sharpie, Dimensionals
Monday, February 18, 2013
Saturday, February 16, 2013
Inspired By... #5: Sunset after a Storm
Good day! Today is shopping Saturday! A day to spend going around browsing and shopping with my mom! Never a bad way to spend the day... and later, I'm going to fire up the old wok and cook up some delicious Chinese dishes! Yum! Now, it's time for another Inspired By... Challenge! This week was my pick, a beautiful sunset after a crazy storm:
This was taken at Matt's parents, and I just love the way the trees look black against the bright, bright sky. Here's how this photo inspired me:
Make sure to pop over to Charissa's blog, Snippets by Design, to see how this photo inspired her!
Supplies used:
Stamps: Lovely as a Tree, Teeny Tiny Wishes
Paper: Very Vanilla
Ink: Daffodil Delight, So Saffron, Regal Rose, Stazon Jet Black
This was taken at Matt's parents, and I just love the way the trees look black against the bright, bright sky. Here's how this photo inspired me:
I used daffodil delight, so saffron & regal rose to sponge on the colours to recreate the sunset in the photo. I like the stark contrast of the staz-on trees :) The simplicity of this card is really quite beautiful too. There are no accessories, just colour! I wanted the panels to be the main focus, and for nothing to take away from them.
Make sure to pop over to Charissa's blog, Snippets by Design, to see how this photo inspired her!
Supplies used:
Stamps: Lovely as a Tree, Teeny Tiny Wishes
Paper: Very Vanilla
Ink: Daffodil Delight, So Saffron, Regal Rose, Stazon Jet Black
Friday, February 15, 2013
KCRR #5: Bloomin' Marvelous!
Today, the selections picked from random.org were #23: Bloomin' Marvelous and #128: Natual Composition Specialty DSP. I was really excited for this combo and knew they would work so nicely together. Here's how my card turned out for this week's challenge:
I love it! I think it is one of my favourites... It came together almost exactly as I though it would (lol a strange occurance in my craft room). The only thing I changed was that I had originally intended on embossing the raspberry ripple flowers in white, but then I realized that would cover far too much of the colour and leave way too much white space on the card (the enemy lol). The natural composition DSP is so pretty and I wanted to make it the co-main focus of this card, so I think the sentiment & banners placement is perfect :)
The embossed white sentiment sure pops against the cardstock and I love the pretty little bow :) Make sure to pop over to Charissa's blog, Snippets by Design, to see what she created with these two elements!
Thanks for looking!
Supplies used:
Stamps: Bloomin' Marvelous
Paper: Natural Composition Specialty DSP, Rasperry Ripple, DSP Stacks, Orchard Harvest DSP
Accessories: White & Clear Embossing Powder, Versemark Ink, Stitched Satin Ribbon
Saturday, February 9, 2013
Inspired By... #4: Key to my Heart
Happy long weekend! I supposed we couldn't have picked a better moving day, we will have lots of time to set-up the new place :) Before all the moving chaos starts, it's time for another Inspired By... Challenge! This week it was Charissa's pick:
A creative top hat designed by Orange U Creative (find her & her other beautiful designs on Facebook). I really played into the vintage-y feel to this card and brought the elements of stripes, red & the key into my card:
Of course, the card did not turn out exactly how I pictured it in my mind, but I still like the end result. The sentiment is a little washed out, but it does say "happy valentine's day." I used the small heart punch and wrote "to my" and attached it to the trinket key, to give the meaning of "key to my heart."
Here's hoping the recipient of this card understands the meaning... I find the card loses it's impact if you have to explain what they mean (lol). Well, guess it's time to start moving things... first to go, my crafting stuff! :) Don't forget to pop over to Charissa's blog, Snippet by Design, to see how this photo has inspired her!
Supplies used:
Stamps: Teeny Tiny Wishes
Paper: Cherry Cobbler, Basic Black, Whisper White
Tools: Hearts Framelits, Small Heart Punch, Word Window Punch, Modern Label Punch
Accessories: Lacy Brocade Embossing Folder, Baker's Twine, Trinket Keys (ret), Tulle Ribbon (ret), Striped Grosgrain Ribbon (ret), Rhinestones
A creative top hat designed by Orange U Creative (find her & her other beautiful designs on Facebook). I really played into the vintage-y feel to this card and brought the elements of stripes, red & the key into my card:
Of course, the card did not turn out exactly how I pictured it in my mind, but I still like the end result. The sentiment is a little washed out, but it does say "happy valentine's day." I used the small heart punch and wrote "to my" and attached it to the trinket key, to give the meaning of "key to my heart."
Here's hoping the recipient of this card understands the meaning... I find the card loses it's impact if you have to explain what they mean (lol). Well, guess it's time to start moving things... first to go, my crafting stuff! :) Don't forget to pop over to Charissa's blog, Snippet by Design, to see how this photo has inspired her!
Supplies used:
Stamps: Teeny Tiny Wishes
Paper: Cherry Cobbler, Basic Black, Whisper White
Tools: Hearts Framelits, Small Heart Punch, Word Window Punch, Modern Label Punch
Accessories: Lacy Brocade Embossing Folder, Baker's Twine, Trinket Keys (ret), Tulle Ribbon (ret), Striped Grosgrain Ribbon (ret), Rhinestones
Friday, February 8, 2013
KCRR #4: Faux Patina
Happy Friday! This is the best kind of Friday as it leads into a long weekend!! This will be BC's first official Family Day :) I have been super busu packing & moving last week, so there hasn't been lots of time for crafting, but I managed to finish today's challenge card this morning (lol). Here's we go, time for another installment of...

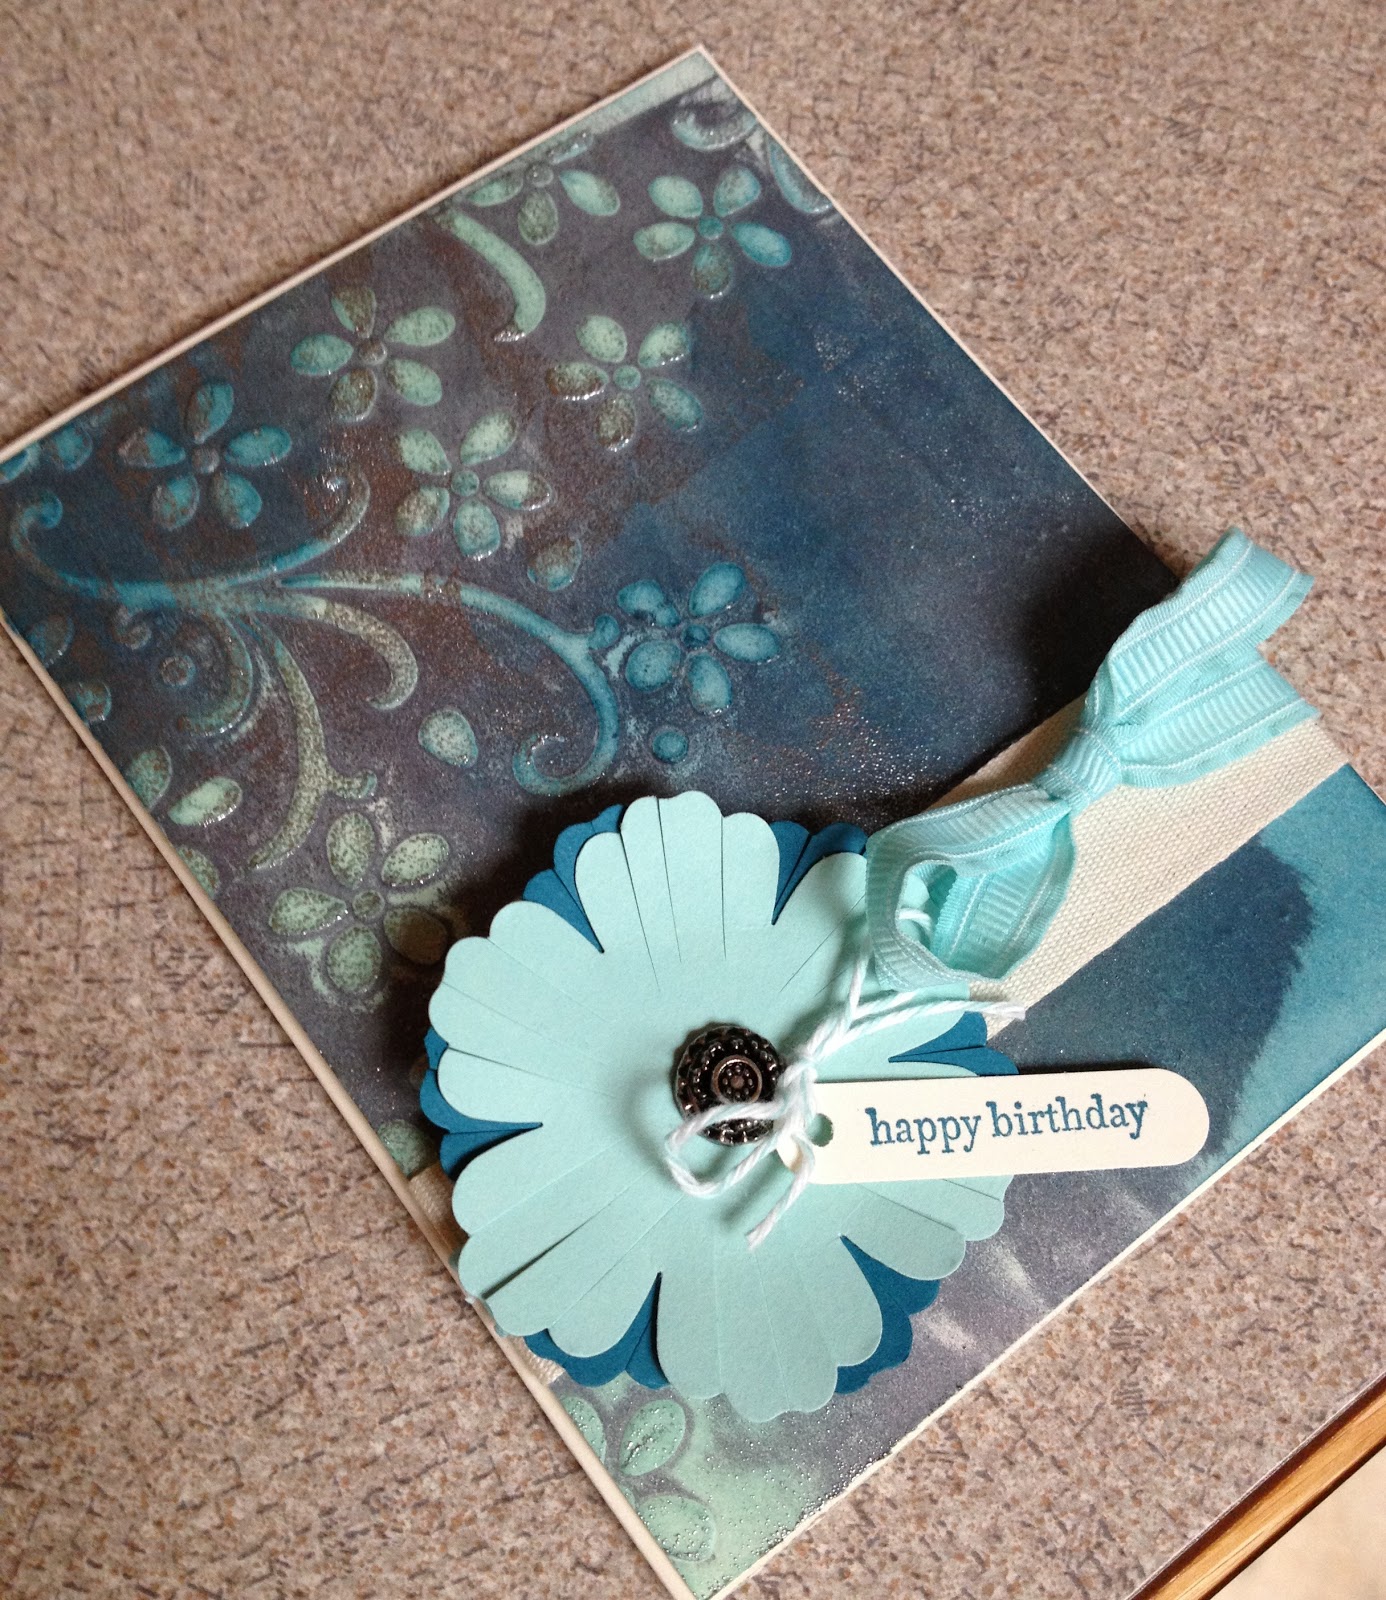
This week's randomly generated elements were the faux patina technique & pool party. I have used the faux patina technique a few times and really like it! It can be dressed up or down. In my blog post Silver Anniversary: Faux Patina, you can see step-by-step instructions on how to complete this technique. I wanted to make a more casual card this time so I used the elegant bouquet emobossing folder, which I covered with basic grey ink, and sponged on pool party & island indigo. Then, after patting versamark onto the paper, I added silver embossing powder (too bad I didn't have pool party embossing powder, as I think it would have been great on here). I thought that there was too much embossing powder, so I brushed a bit away with a dry paintbrush. Here's the final product:
I really like the way it turned out! Such a quick and easy card that packs a big punch!
Supplies used:
Stamps: Teeny Tiny Wishes
Ink: Basic Grey, Pool Party, Island Indigo
Paper: Very Vanilla, Island Indigo, Pool Party
Tools: Blossoms Punch, Word Window Punch, Elegant Bouquet Embossing Folder
Accessories: Silver Embossing Powder, Antique Brad, Baker's Twine, Ruffled Ribbon, Natural Cotton Ribbon
Saturday, February 2, 2013
Inspired By... #3: Hello!
Happy weekend! It's going to be a busy one for me... we are travelling to Kamloops (about 6 hours) to see Eric Church in concert! For those of you who don't know who that is, he is a country singer :) I recently started listening to country and have been successful in converting my boyfriend, Matt, to listen to it too hehe :) My sister, brother, his girlfriend, Matt & I are all going, so it will be a lot of fun! Here's hoping the roads & weather will be nice to us! Anywho... it's time for this week's Inspired By... Challenge!
The photo selection this week was mine, a pretty little violet (my mom calls them Johnny Jump-Ups) :) This little guy was poking up by the garden at my mom's place (I was doing some weeding while she was away last summer) and I couldn't help but think he was saying, "Oh Hello"
I kept that image in mind when I made this little hello note:
Originally, the card started out as a 4x4, but after I was finished, I thought there was far too much empty space at the top of the card and cut off 3/4" - making the final product a friendly 4x3-1/4. Perfect to give out as a quick hello note! The violet was created using the build a blossom punch. I trimmed each big petal to add the little dip in the middle of each petal. I like that each of the petals are not the same, as it would be in nature :) Oh, about the tea-cup... I just thought it would be the perfect image! Tea is such a friendly thing :) It was stamped and trimmed out with paper-snips.
Thanks for looking today and don't forget to pop over to Charissa's blog, Snippets by Design to see how this photo inspired her! :)
Supplies used:
Stamps: Lacy & Lovely, Tea Shoppe
Paper: Basic Grey, Concorde Crush (ret), Daffodil Delight, Gumball Green
Ink: Concorde Crush (ret)
Tools: Build a Blossom Punch, Bird Builder Punch, Crop-a-Dile (ret)
Friday, February 1, 2013
KCRR #3: An Experiment
Hello! :) Happy Friday! (finally) hopefully today zooms right by... Time for another instalment of:
This week, the randomly selected elements were chevron pattern & scallop circle. I immediately thought about using the Howlstooth & Scarringbone DSP from the holiday mini, but then I remembered that the new scoring borders plate came in my most recent shipment of goodies! I deceided to give it a try in this kid's birthday card:
The scoring borders plate will definitely take some practice!! It turned out half decent, and to my surprise, quite evenly spaced (lol, not like I tried or anything...) My original plan was to just have the red & peach parfait paper, with no balloons... but when I put the card together, I realized that it really needed something else. I think the balloons work perfectly here! Oh, when I thought I was done the card, I showed it around to everyone excitedly, and my sister, in her infinite wisdom (anyone who knows my sister would laugh and laugh hehe) said, it needs sparkle! Thus, the addition of the rhinestones! Not that a little bling every hurt my feelings :)
Thanks for looking and be sure to check back again next Friday for another addition of KCRR! Pop over to Charissa's blog, Snippets by Design, to see what se created with this week's elements!
Supplies used:
Stamps: Patterned Party, Word Play
Paper: Whisper White, Peach Parfait (ret), Micheal's Red, Big Top Birthday DSP (ret)
Ink: Tangerine Tango
Tools: Borders Plate, 1-3/4" Circle Punch, Scallop Nestabilities
Accessories: Polka Dots Embossing Folder, Rhinestones, Dimensionals
This week, the randomly selected elements were chevron pattern & scallop circle. I immediately thought about using the Howlstooth & Scarringbone DSP from the holiday mini, but then I remembered that the new scoring borders plate came in my most recent shipment of goodies! I deceided to give it a try in this kid's birthday card:
The scoring borders plate will definitely take some practice!! It turned out half decent, and to my surprise, quite evenly spaced (lol, not like I tried or anything...) My original plan was to just have the red & peach parfait paper, with no balloons... but when I put the card together, I realized that it really needed something else. I think the balloons work perfectly here! Oh, when I thought I was done the card, I showed it around to everyone excitedly, and my sister, in her infinite wisdom (anyone who knows my sister would laugh and laugh hehe) said, it needs sparkle! Thus, the addition of the rhinestones! Not that a little bling every hurt my feelings :)
Thanks for looking and be sure to check back again next Friday for another addition of KCRR! Pop over to Charissa's blog, Snippets by Design, to see what se created with this week's elements!
Supplies used:
Stamps: Patterned Party, Word Play
Paper: Whisper White, Peach Parfait (ret), Micheal's Red, Big Top Birthday DSP (ret)
Ink: Tangerine Tango
Tools: Borders Plate, 1-3/4" Circle Punch, Scallop Nestabilities
Accessories: Polka Dots Embossing Folder, Rhinestones, Dimensionals
Subscribe to:
Posts (Atom)